Deployment Pipelines in Power Platform
Power Platform Pipelines simplify application lifecycle management (ALM) by offering deployment automation capabilities. These pipelines enable easy deployment of solutions within Power Platform, with governance, visibility, and safeguards automatically built in. This results in faster, higher-quality business solutions and reduced effort.
Power Platform Pipelines is a model-driven application enabling ease of use and permitting you to do customisations as needed.
Let’s now dig into the Power Platform Pipeline Application implementation and how you can use it in your day-to-day deployments.
You MUST be an Admin in the Power Platform to set up and configure Power Platform Pipelines.
1. Navigate to Power Platform Admin Center
We first need to create a Host Environment. We will install the Power Pipeline model-driven App in the host environment. This environment can be non-managed.
However, our Target Environments (e.g., Dev/Test/Prod) MUST all be managed environments, as Power Pipeline only works with managed environments. You can refer to Microsoft Docs, which lists all the Prerequisites to set up Pipeline in Power Platform.
If you want to convert your environment to Managed, you can do that via the Admin Center. But before you do that, have a read-through about the Managed Environments.
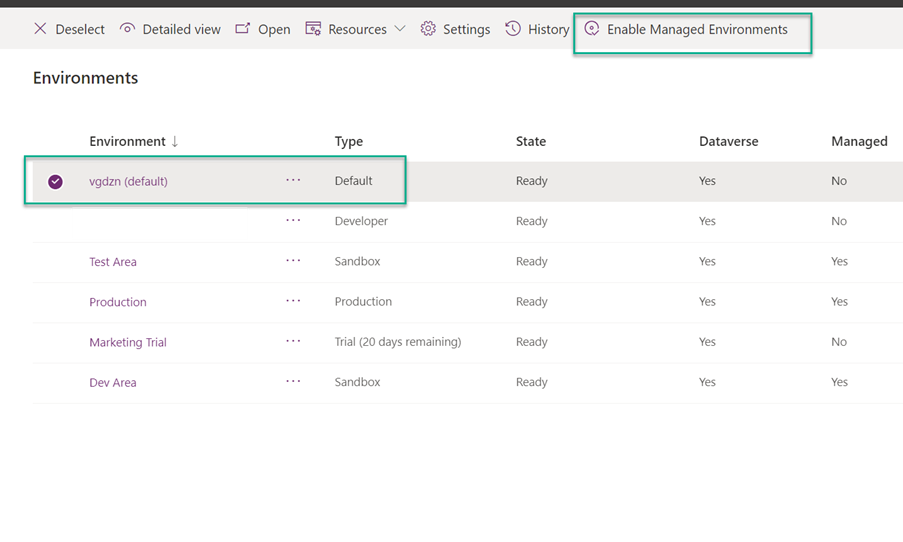
2. We now need to create our “Host” environment. Let’s do it!

a. Your “Region” MUST always be the same as your Dev/Test/Prod.
b. Dataverse MUST always be enabled. (It’s one of the Prerequisites).
Let’s continue with provisioning the host environment by clicking “Save”.

Now we have our host environment ready to be used.

3. The next step is to go into the admin settings of the environment and install the Power Platform Pipelines model-driven app.
a. Open the Environment and click Resources, then click Dynamics 365 apps.

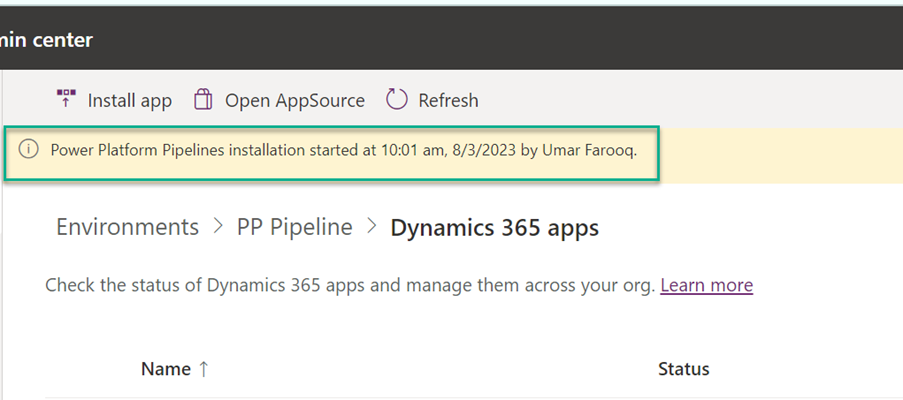
b. On the next page, click Install app. This will open a sliding window from the right side, where you can then scroll down and select Power Platform Pipelines. Click Next

c. Agree to the terms and hit Install!

d. Now let’s wait for the installation to complete and then we can get started.
4. Open the newly provisioned environment for Power Platform Pipeline. You will instantly see a new model-driven app. So Cool!

a. Double-click and open the model driven app. You will see landing page like below.
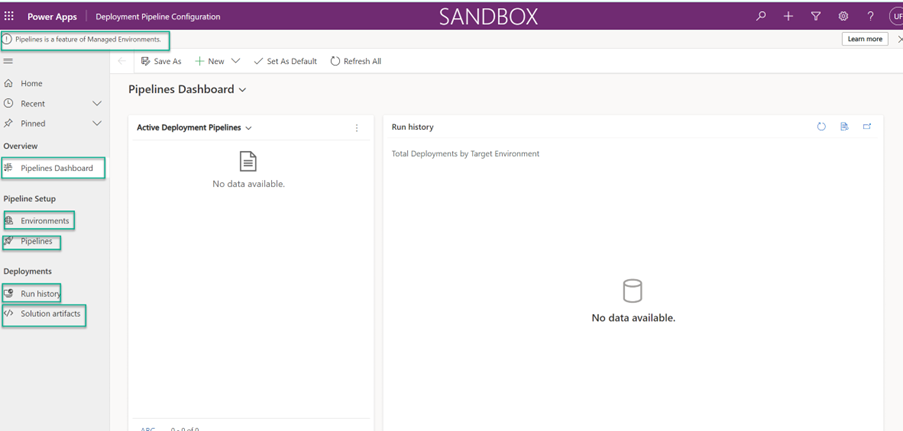
b. I will now give you high-level information on all the listed items in the site map. Just before I do that, have you noticed a banner on top?
Pipelines are a feature of Managed Environments.
c. Site Map Items:
· Pipelines Dashboard: These OOTB dashboards will provide insights about the deployment pipeline items. You can create your own Dashboards based on your criteria as well.
· Environments: This is where we will configure all the environments we want to make a part of the Power Platform Pipeline.
· Pipelines: This is where we will create and organise our pipelines, e.g., from Dev > Test > Prod. You can have multiple pipelines created as desired.
· Run History: This provides you logs of all the pipeline runs which have been initiated and completed.
· Solution Artifacts: All your solution folders (solution.zip) files are there.
5. Let us now configure our environments in the app. To do that, you must get back into the Admin Centre and get the “Environment ID” of each environment that will be a part of the Pipeline.
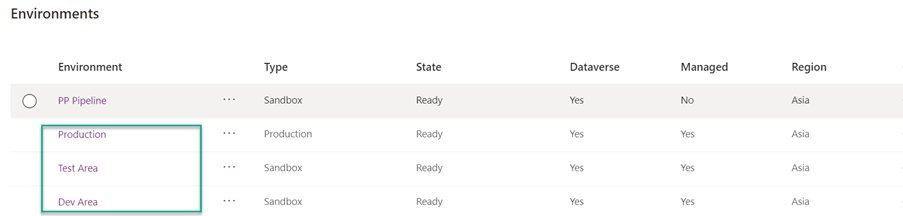
Since I will add three environments to my Pipeline, I must create three environment configuration records.

a. Give a meaningful name to the new record.
b. Choose the relevant Environment Type.
c. Environment ID is available in the admin center for each environment.

d. Hit Save and Close and you will notice on the Main view that the status is “Pending”.

e. Give it a few seconds and hit “Refresh”. If your Environment ID is correct the status will change to “Success”. Which means you have successfully configured your Dev Environment to be used in the Pipeline.

f. Repeat the same process for your other environments. I now have all the 3 environments configured.

6. We will now create our first Pipeline followed by linking our Environments to the pipeline.
a. From the sitemap click Pipelines > New > Create Record > Save.

b. Once you hit Save you will see some additional sub grids become visible.

c. Linked Development Environments: We will now link our development environment in this sub-grid. We already created the Development environment. So, we will “Add Existing Deployment Environment”.

d. Deployment Stages (Deployment Pipeline): This is where you will create stages from which the Deployment has to pass through. E.g., Dev to Test to Production. We will now create our first stage for Test Environment.

Suppose the lookup field “Previous Deployment Stage” is left blank. The Dev environment is already linked in the above subgrid. Therefore, there is no Previous Deployment Stage. Fill out the data and Save and Close.
Now we will create another stage: deployment from test to prod.

You now see that the lookup field “Previous Deployment Stage” on this record has a previous stage. This is because the test stage pipeline will go to its final Target environment, i.e., Prod Environment.
Below is our final configuration against the “General Implementation Pipeline”.

Now let’s discuss how you can share this newly created Deployment Pipeline with your Team or co-workers who are also Developers and will need access to this newly created pipeline for deployment purposes.
Initially, when we installed Power Platform Pipeline from the admin centre. As a result, three additional security roles were also created.

The first step is to assign the “Deployment Pipeline User” security role to your development team or co-workers. This must be done from the admin centre.
The second and last step is to share the pipeline record with your development team or co-workers.

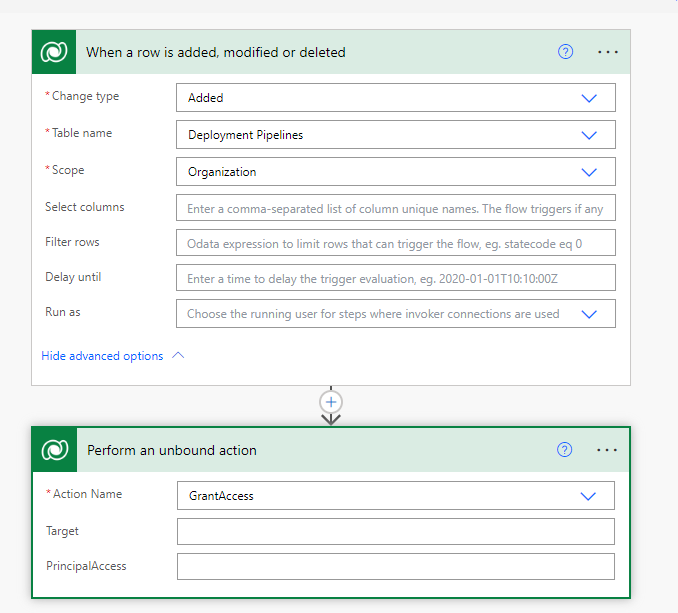
Tip: You can build a flow to achieve that rather than doing this manually. In Power Automate, you can use the “Perform an unbound action” to Grant access to records.
Happy Automation!
The last part of this post demonstrates how to use the Deployment Pipeline and how the configuration reflects what we have done above.
Below is my customised Dev solution I would like to deploy to test and eventually Prod. I am now in my Dev environment and have a custom solution, “Account Customisation,” which I would like to move through to Test and Prod via the newly created pipeline.

Click the Pipeline icon within the solution and a new page open. This will show you the configuration you have created against the pipeline.
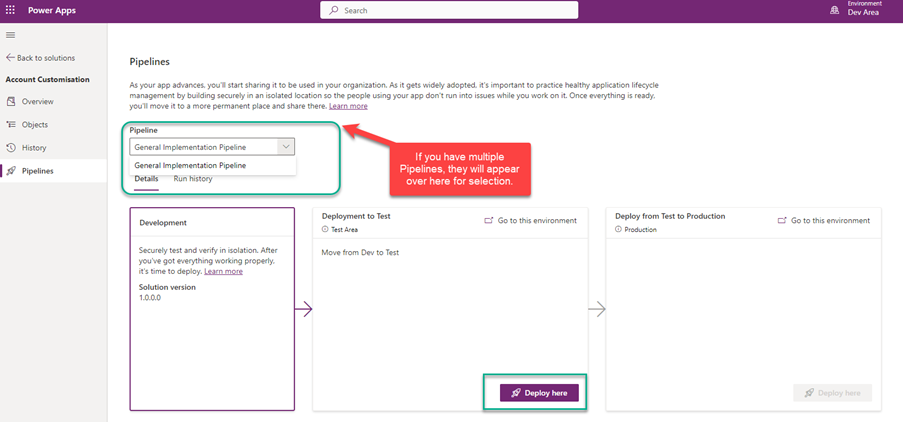
The “Deploy here” button in the Test Stage is where it will start form since the configuration we did was Dev > Test > Prod. Therefore, in the last stage, the Prod stage, the button is greyed out.
Now click the Deploy Here button to see a window sliding from the right.

You can even Schedule the Deployment within the Power Platform. Amazing!
Click Next, and you will see the Summary Page. On the Summary Page, you will get any connection references and environment variables you configure. In my example demo, there are not any. Therefore, I will see the final summary of my deployment package.

Once you are done, simply hit “Deploy”.

Notice that after successful Deployment the “Deploy here” button under the prod stage is now available to be used.

and finally some additional Insights/data which is available from the Power Platform Pipeline Model Driven App as below.


That is all! If you need assistance in configuring your Power Platform environment for Deployment Pipelines, please don’t hesitate to get in touch with me or the team at Centauri.